
Form Builder
To configure the request form, go to Books > Settings > Add-Ons and make sure you’re on the “ARC Requests” page. The first section on the page is for “Form Fields”.
There are two columns:
- Your Form – These are the enabled fields. Any fields in this column will appear on the front-end of the site.
- Available – These fields are disabled. If you don’t want to use a certain field, drag it into this “storage” column and it will not appear on the front-end.
You can drag and drop each field to rearrange them in the order you desire.
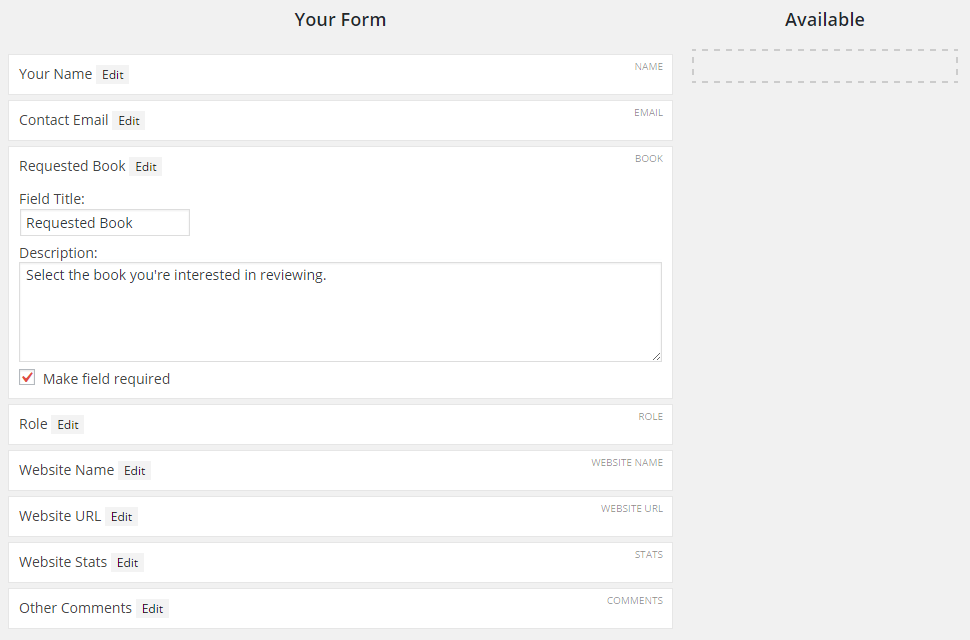
Each field has an “Edit” button. Clicking that will expand the field and reveal a few extra settings, including:
- Field Title – Main title. This will show up on the front-end.
- Description – Can be used to add extra text explaining the field.
- Required Checkbox – Some fields have an extra checkbox where you can make the field required. If checked, no one will be able to submit the form without filling in that field.
Other Settings
There are a few other settings on this page.
- Notify Me – If you want to receive an email each time a new request is submitted, then enter your email address in this text box. Multiple email addresses can be entered and separated with a comma.
- Statuses – These are the different statuses available for ARC Requests. You can change these by entering a different status name on each line. The first status will be the one applied to brand new ARC Requests as they’re submitted.
- Success Message – This is the message that will be displayed to the user after they submit the request form successfully.